
[ad_1]
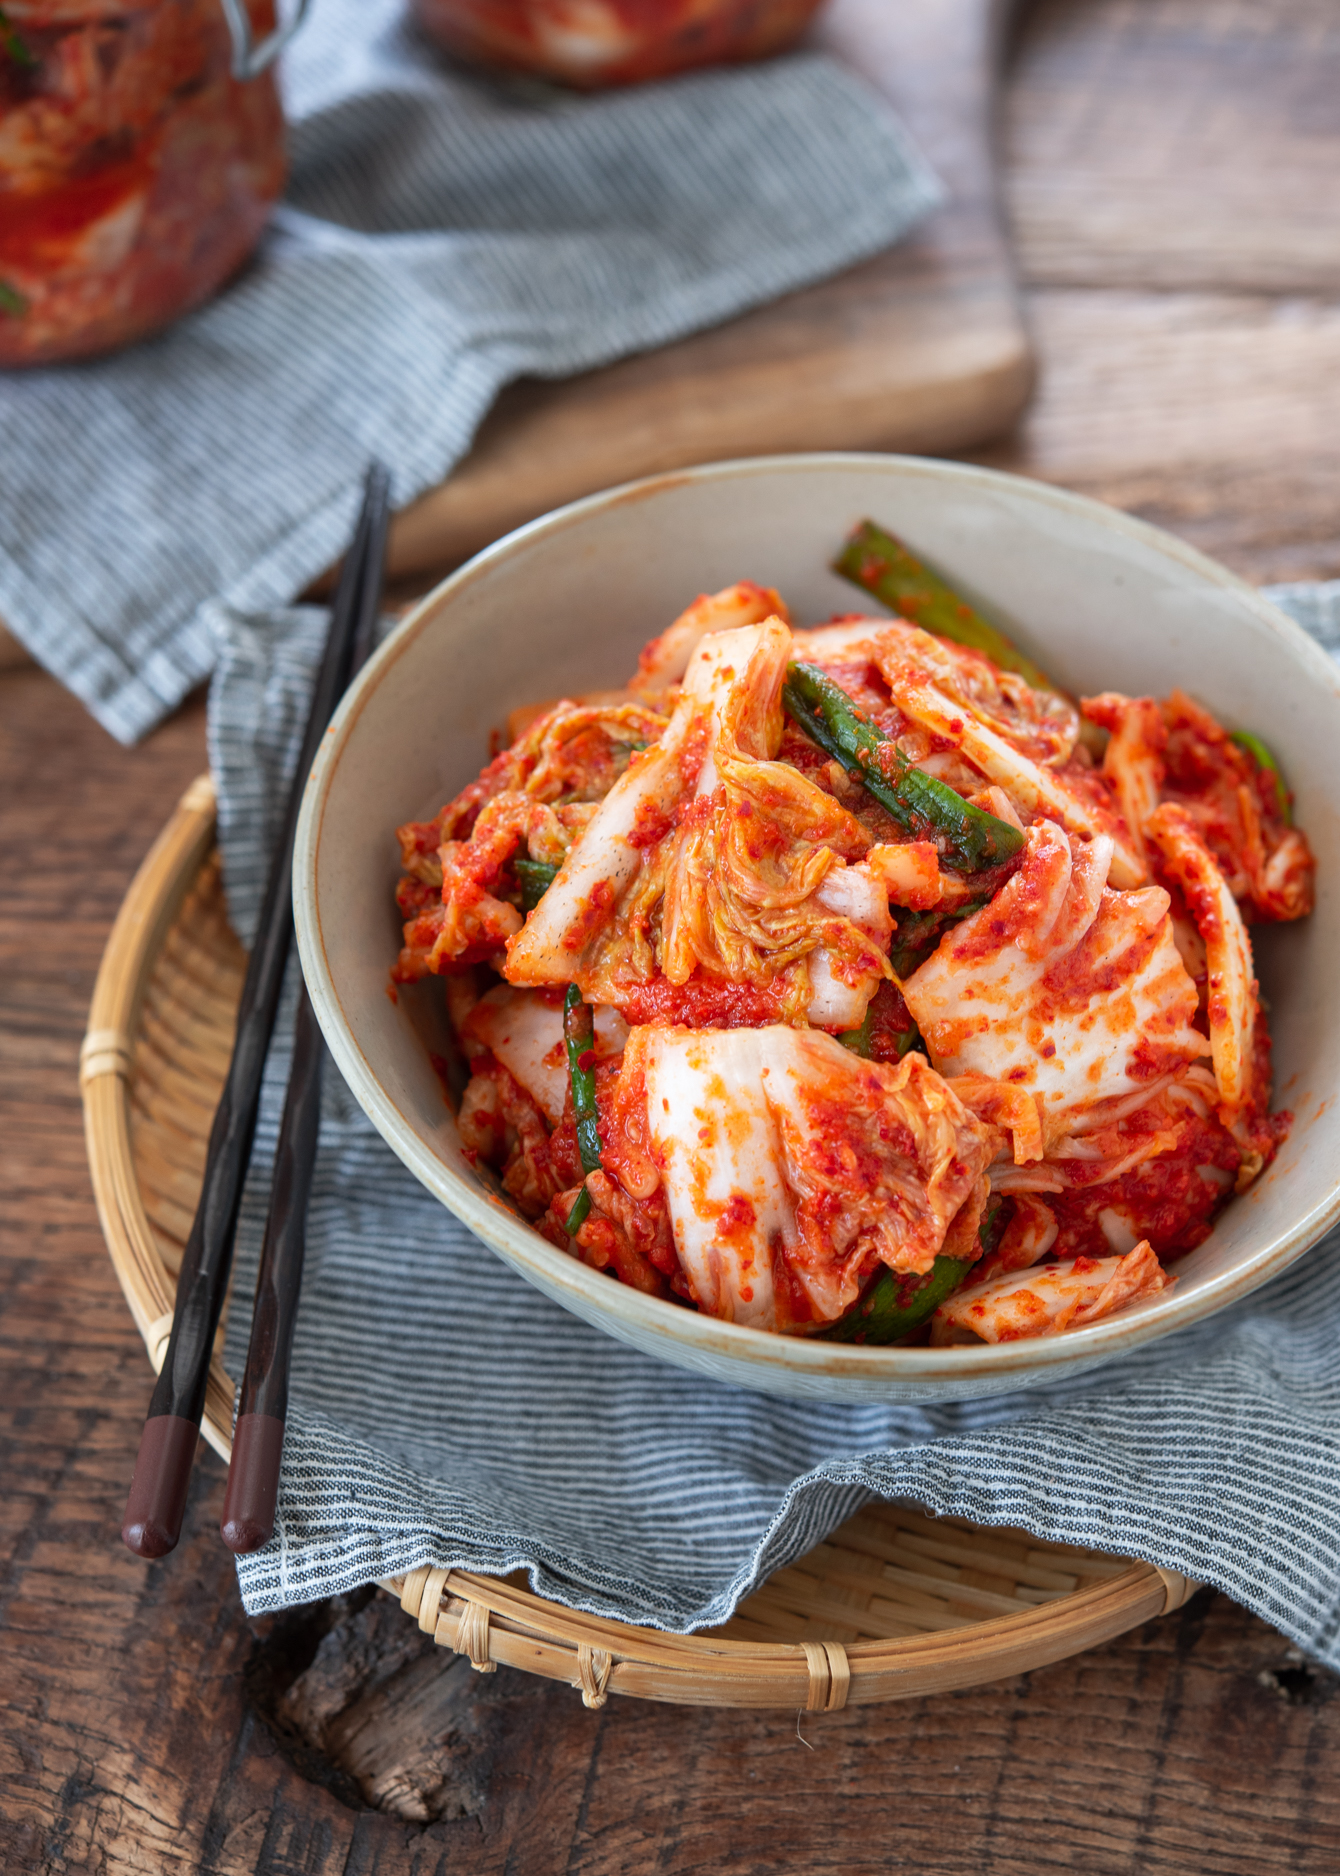
Easy kimchi recipe for authentic Korean flavor with less effort! This mak kimchi uses chopped napa cabbage and a quick seasoning paste, no whole-leaf salting required. Tangy, spicy, and ready to ferment in just a day. Perfect for beginners or busy cooks.

If traditional kimchi feels a little too intimidating, you’re not alone. That’s why I always come back to this easy kimchi recipe, known in Korea as mak kimchi (막김치). It literally means “carelessly made kimchi,” but don’t let the name fool you.
This is the quick, everyday version I grew up eating—chopped napa cabbage tossed with a chili seasoning paste, no whole-leaf salting or long prep required.
Get new recipes via email:
I still make this shortcut version when I want simple homemade kimchi on the table fast. It has all the tangy, spicy, and savory punch you’d expect from authentic Korean kimchi—just with less effort.
Whether you’re trying kimchi-making for the first time or simply want a faster method, this is the one I recommend.
Looking for the traditional way of making kimchi? Try my authentic whole cabbage kimchi for kimjang—it walks you through the full process, from salting to fermentation, with all the tips you need. And if you’re curious about other varieties, check out my complete collection of Korean kimchi recipes for more inspiration.
A Closer Look at the Key Ingredients
After years of making kimchi both in Korea and abroad, I’ve found that choosing the right ingredients is key—especially for quick kimchi like this. Here are my go-to ingredients and why they matter.
- Napa Cabbage: This is the classic base for kimchi, known for its crunchy texture that softens beautifully as it ferments. Can’t find napa? Green cabbage is a great substitute. It won’t ferment quite the same, but still makes a tasty variation—check out my green cabbage kimchi recipe.
- Korean Coarse Sea Salt (cheonilyeom): Korean sea salt draws moisture slowly and evenly, which helps preserve the cabbage’s crunch. I’ve tested regular table salt—it makes the cabbage too limp. Stick with coarse salt made for kimchi when you can.
- Korean Chili Flakes (Gochugaru): This gives kimchi its signature color and spicy kick. I recommend using gochugaru made in Korea—it tends to have better flavor and brighter color. Avoid chili flakes that look dull or brownish.
- Starch (for the paste): When I’m making a big batch or want smoother texture, I cook a quick sweet rice flour paste. But on lazy days, leftover rice blended smooth works just fine. Either way, starch helps the chili paste cling better and boosts fermentation.
- Fish Sauce & Salted Shrimp: These are key for authentic depth and umami. I use Korean anchovy fish sauce and saeujeot (salted shrimp) in most of my batches. If you’re allergic to seafood or prefer a vegan option, I recommend soup soy sauce as a plant-based substitute—just like I do in my vegan kimchi.
- Sweetener (Fruit or Sugar): A bit of natural sweetness helps balance the spice and acidity. For this recipe, I used a blend of apple and pear nectar from a local Latin grocery store—it worked beautifully and added just the right touch.
- Sea Kelp Stock (Optional): While not required, this stock adds a layer of savory depth to the kimchi paste. Simmer a small piece of dried kelp in water, then let it cool before blending it in.
You don’t need fancy gear to make mak kimchi at home, but a few key tools will make the process smoother (and cleaner).

- Extra large mixing bowl: You’ll need something big enough to salt and toss the cabbage. When I don’t have a big enough bowl, I use my kitchen sink—just be sure it’s spotless.
- Big Colander: After rinsing, you’ll want to drain the cabbage thoroughly. A large colander helps you get rid of excess water without crushing the leaves.
- Kitchen Rubber Gloves: I learned the hard way—gochugaru will stain your nails red for days. Now I never mix kimchi without gloves.
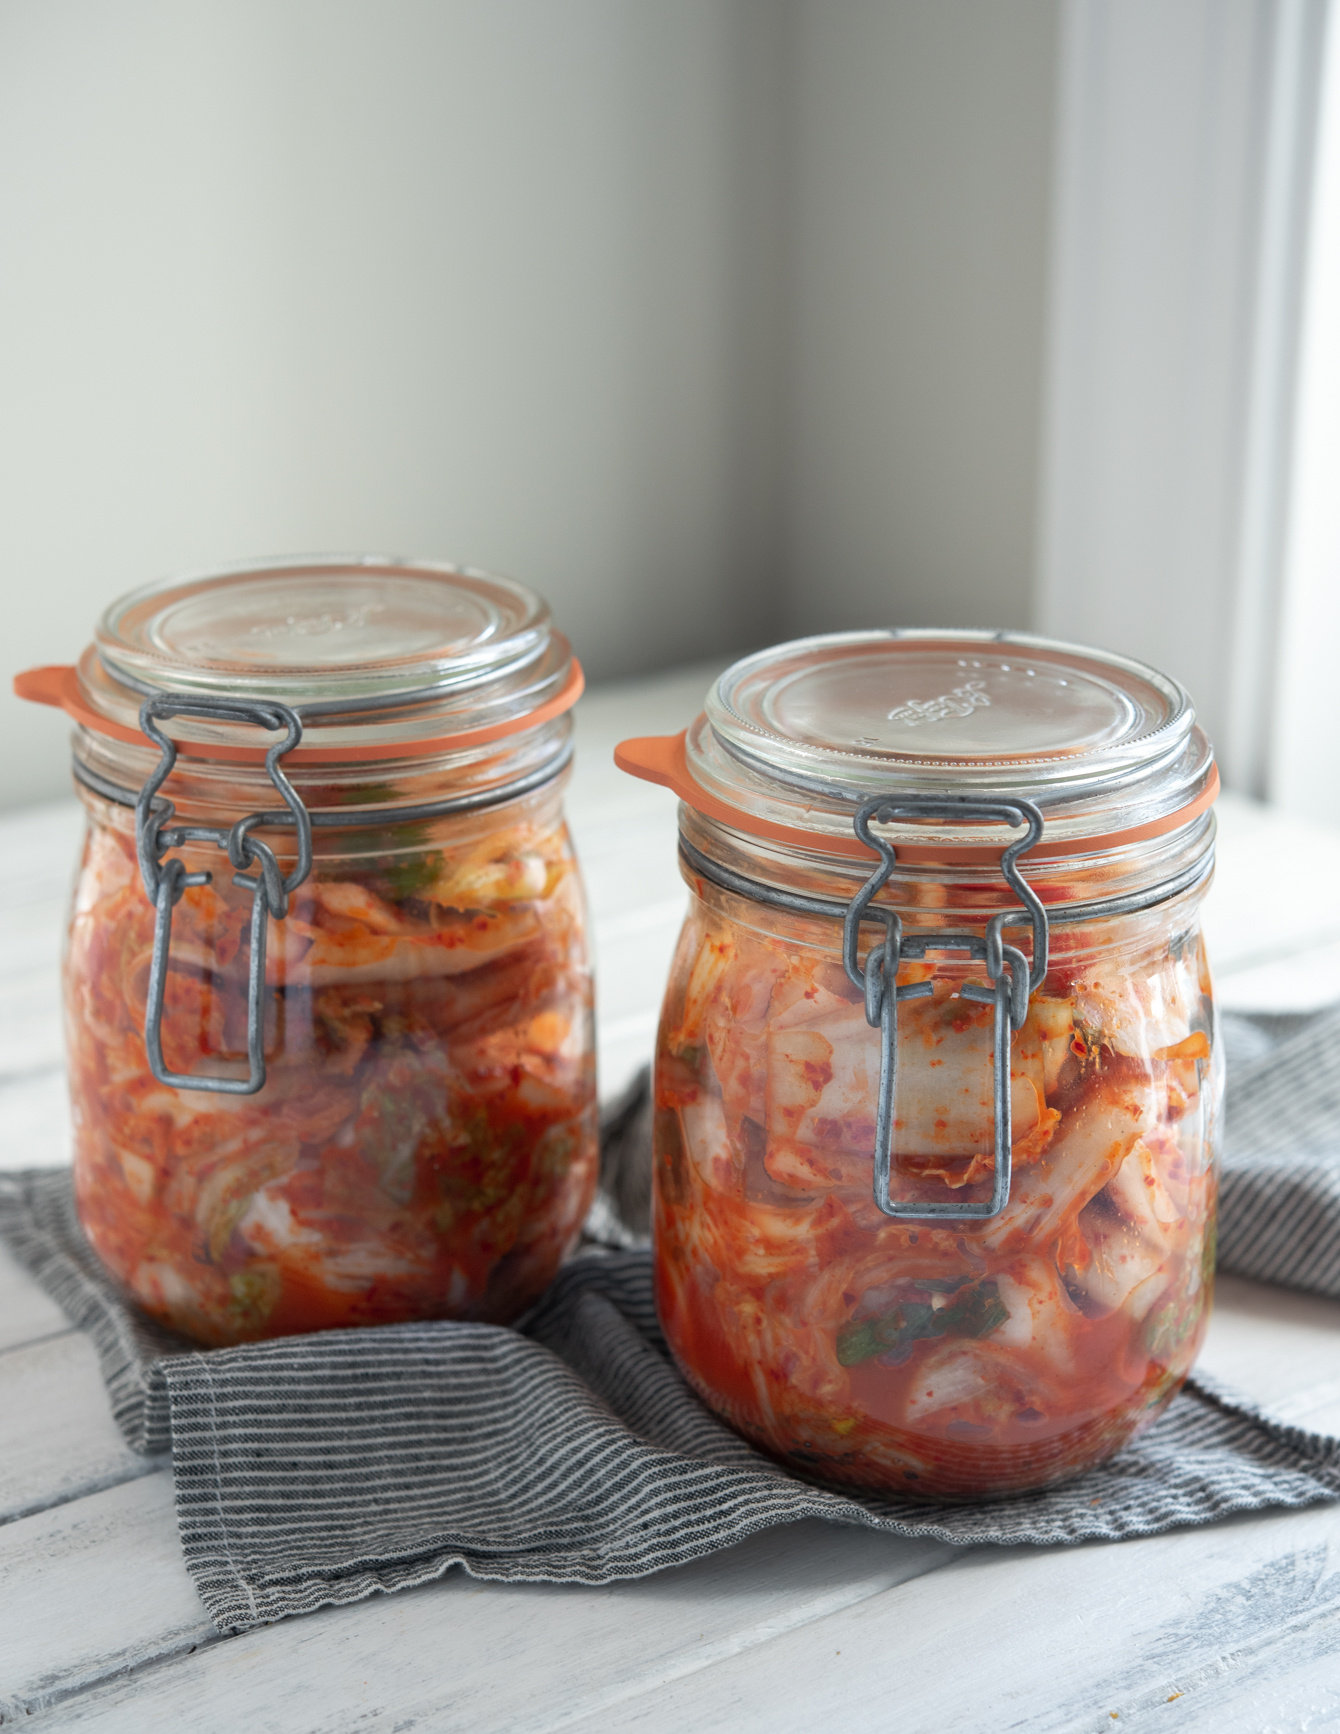
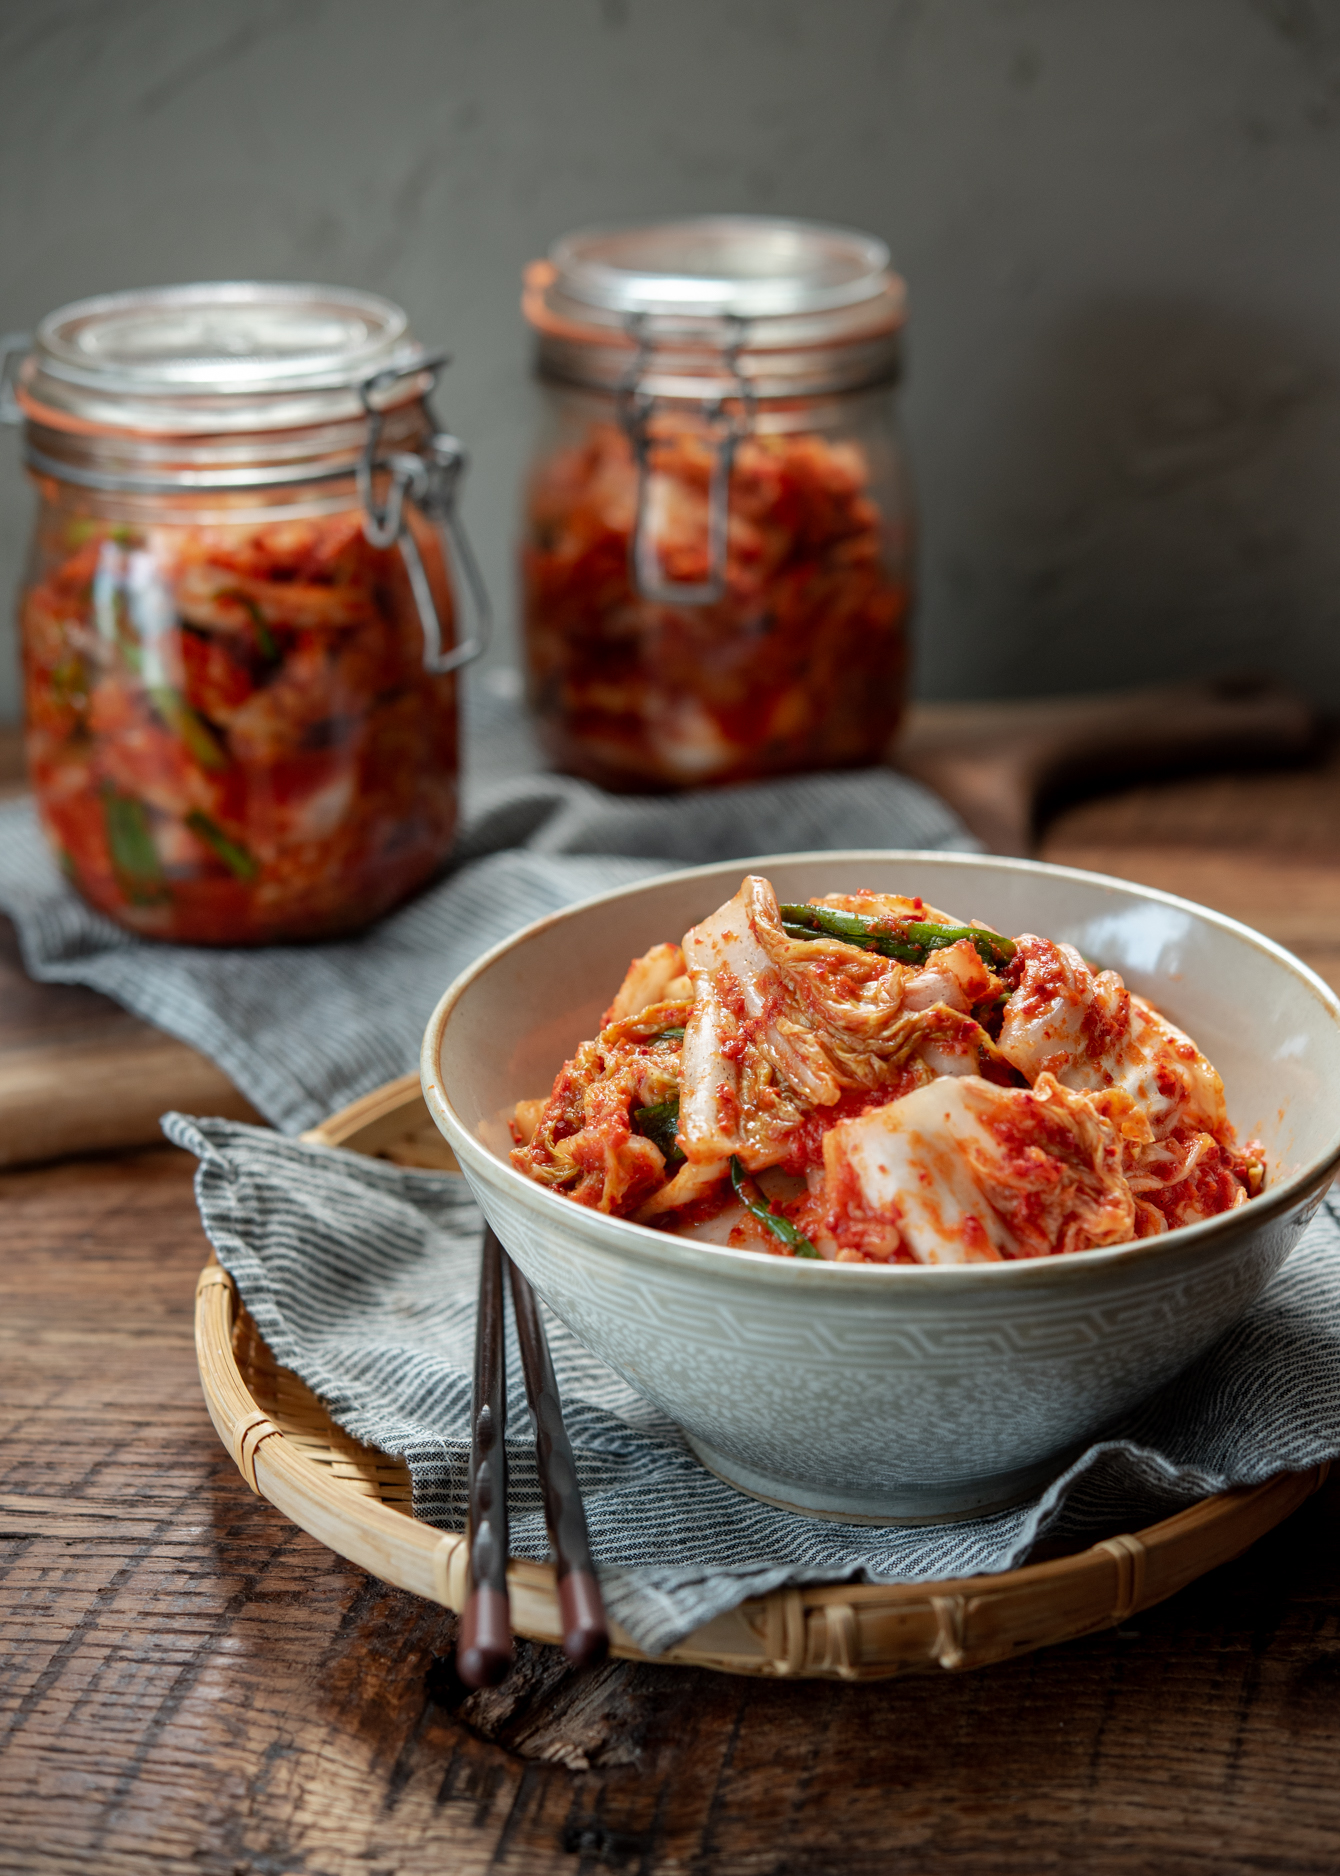
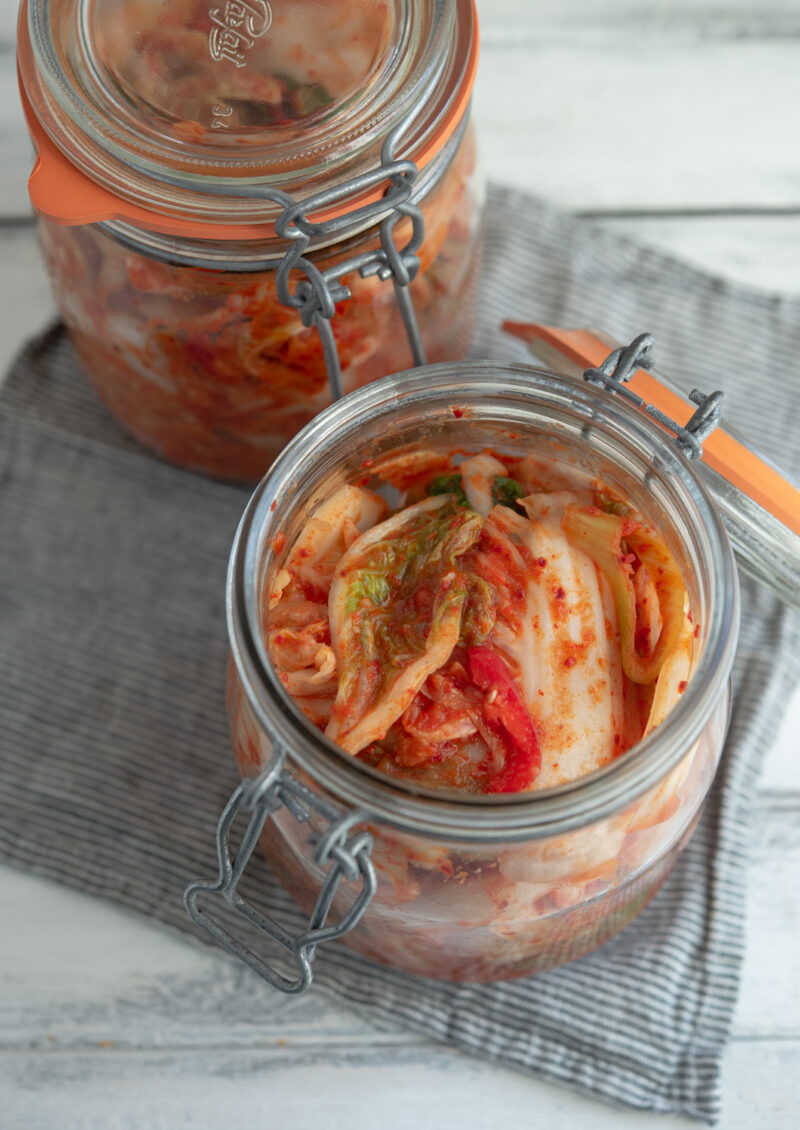
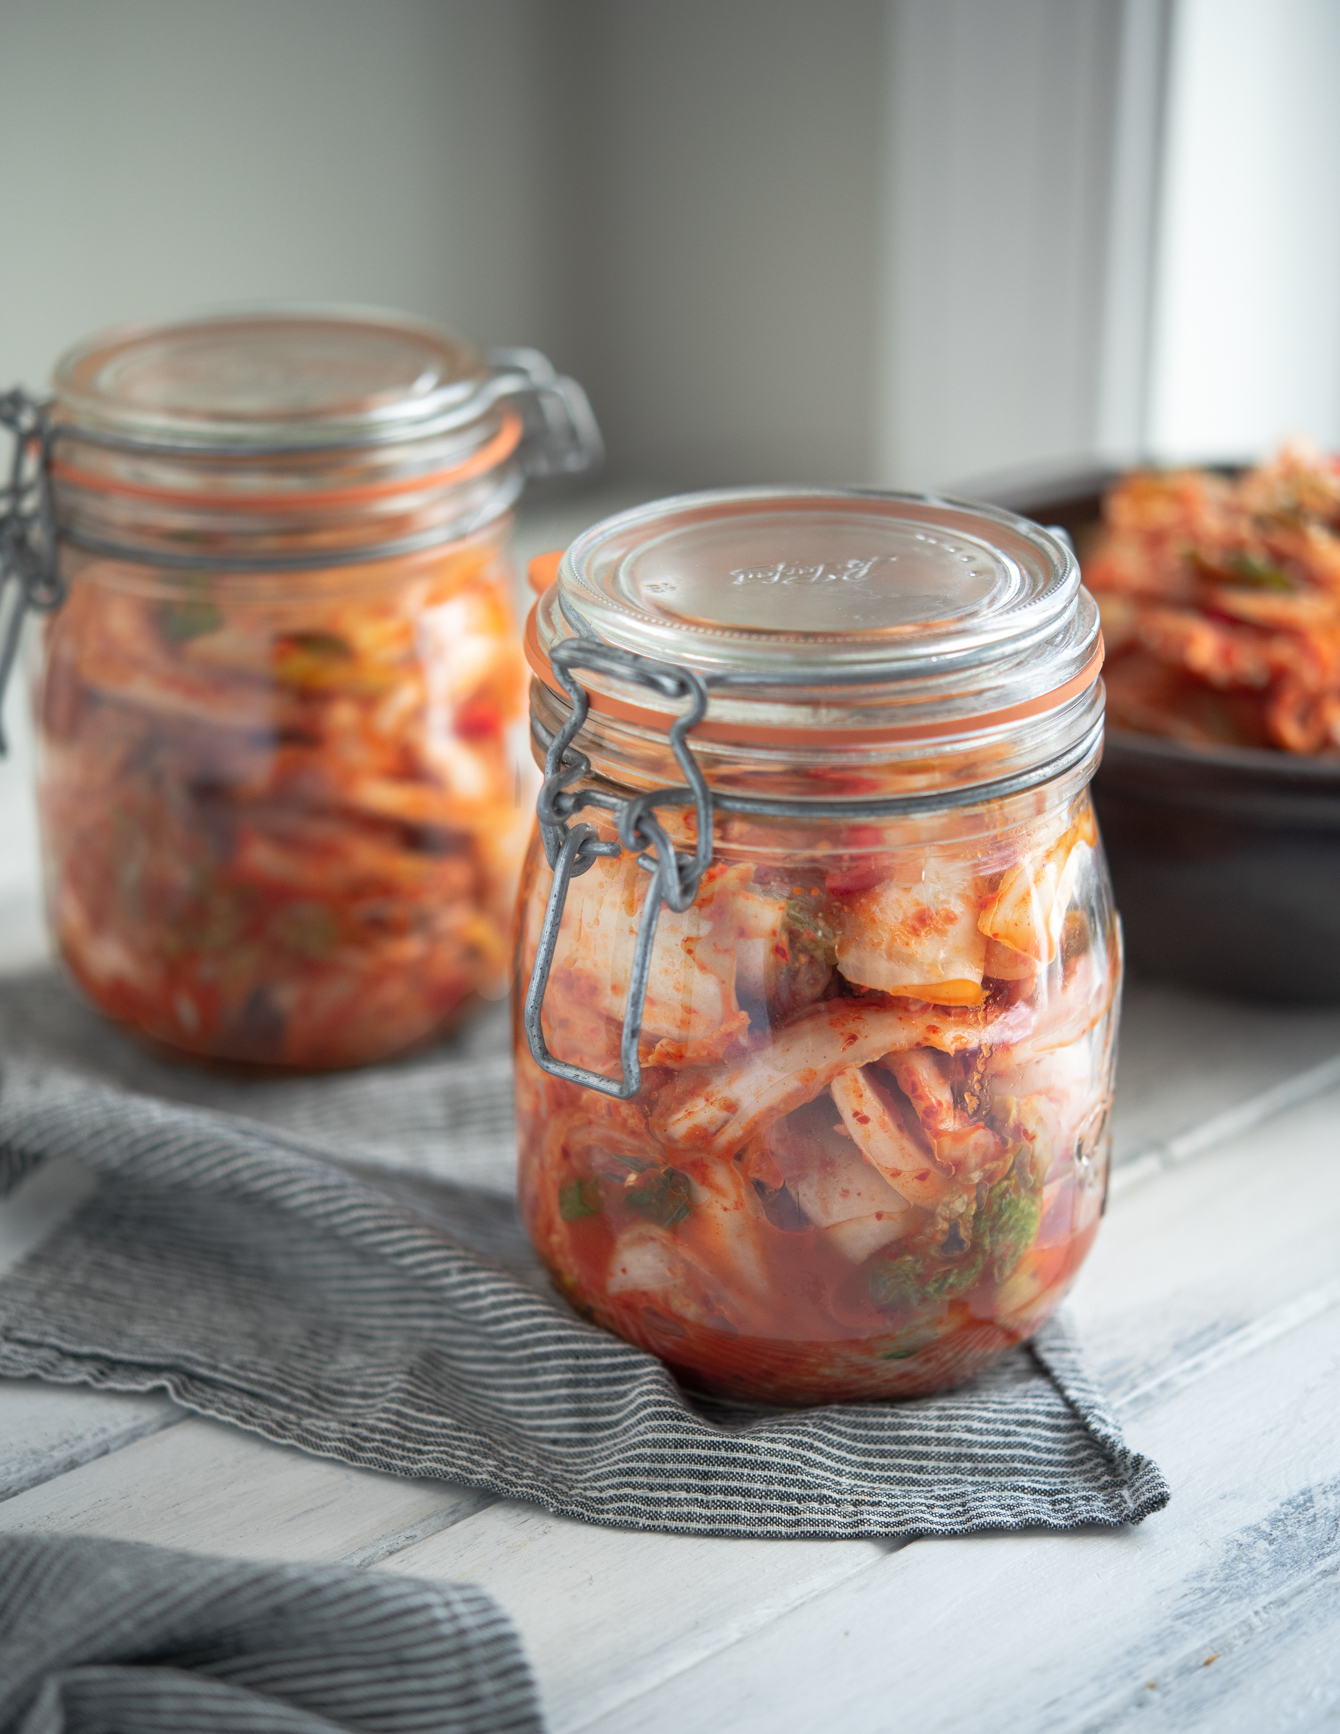
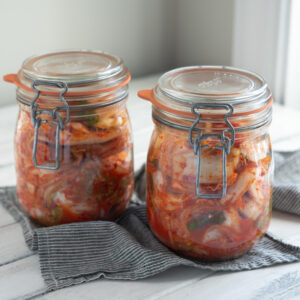
- Storage Jars: I prefer glass jars with airtight lids for fermentation. Leave some headspace so the kimchi can expand as it ferments. If you don’t have large jars, just divide the batch into smaller ones.
How I Make Easy Kimchi: Step-by-Step Guide
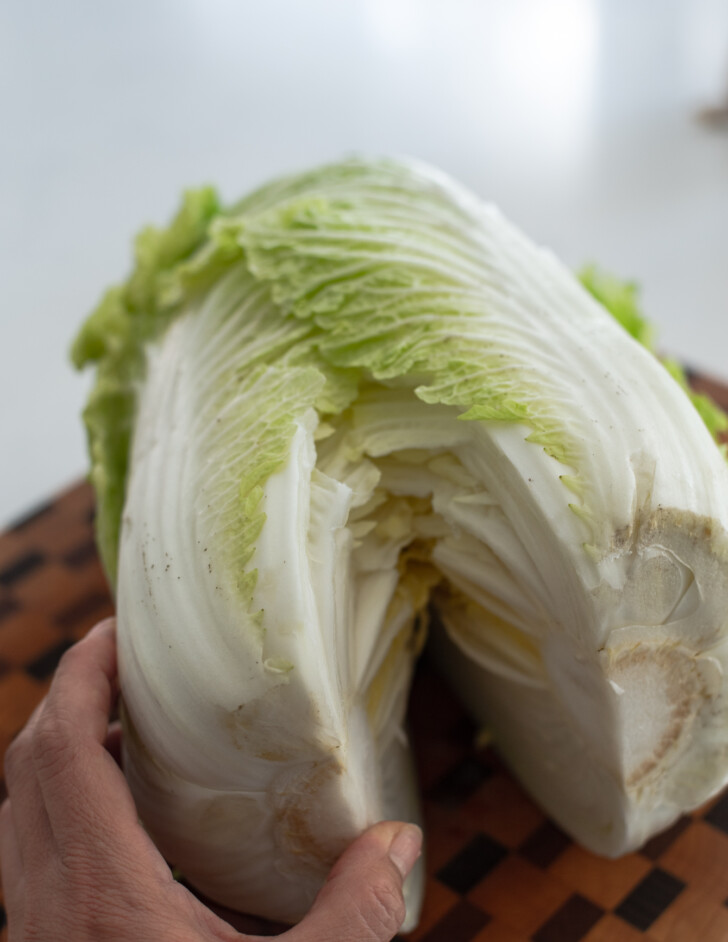
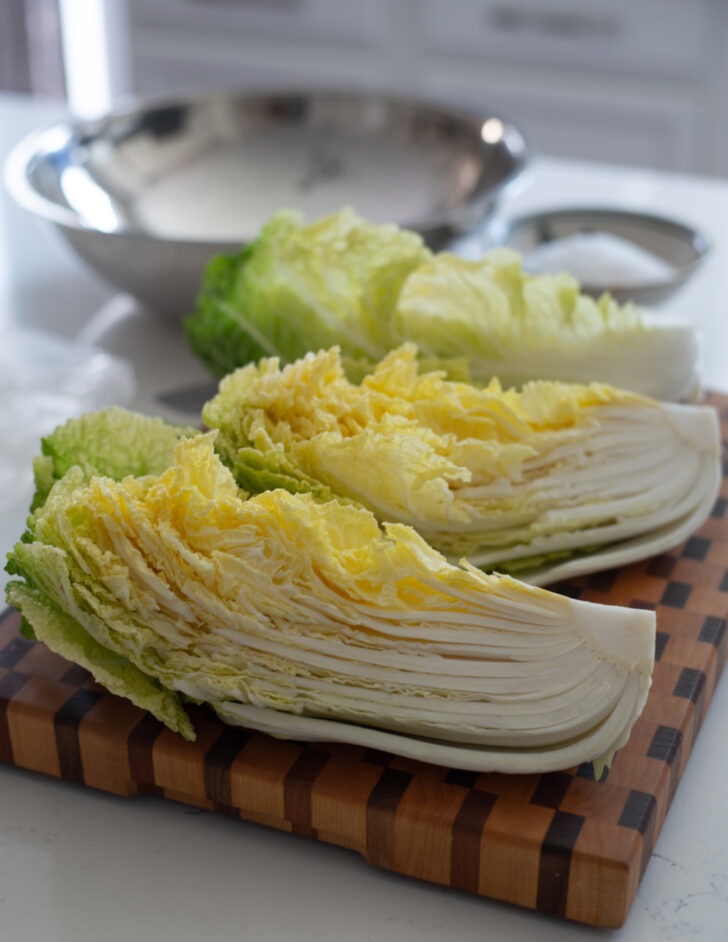
1. Prepping the Cabbage: Start by quartering the napa cabbage the traditional Korean way—cut a small slit at the base, then split it open by hand. This helps keep the leaves intact and gives better texture later on.

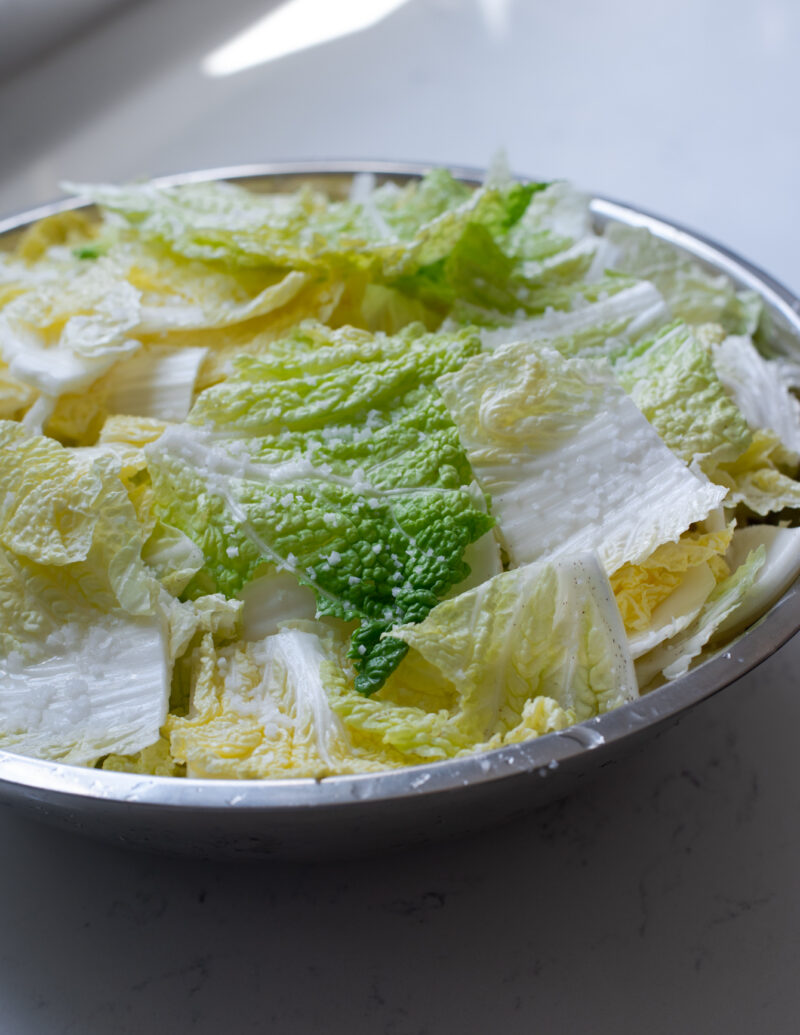
2. Salting the Cabbage: Slice the quarters into large chunks and layer them with coarse Korean sea salt. I do this in a giant bowl (or my clean kitchen sink) to make sure everything gets evenly salted. Let it sit until the stems bend easily without snapping.
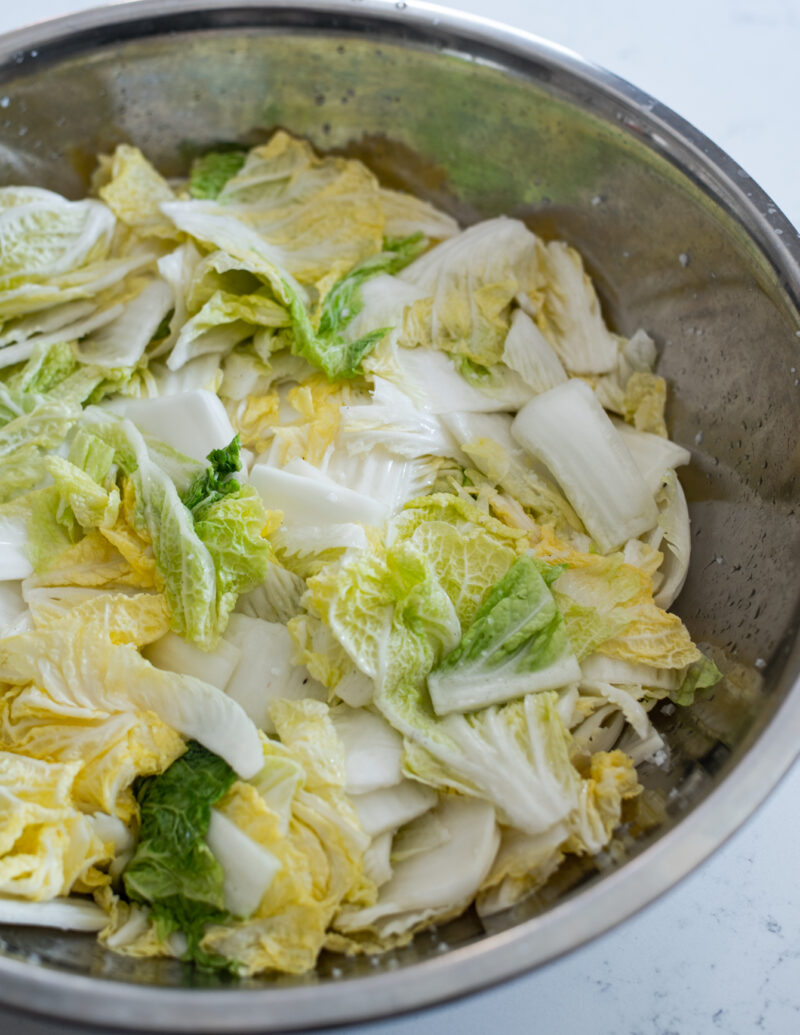
3. Rinse and Drain: After salting, rinse the cabbage a few times to remove excess salt. Then gently squeeze out extra moisture. You want the cabbage softened, not soggy.
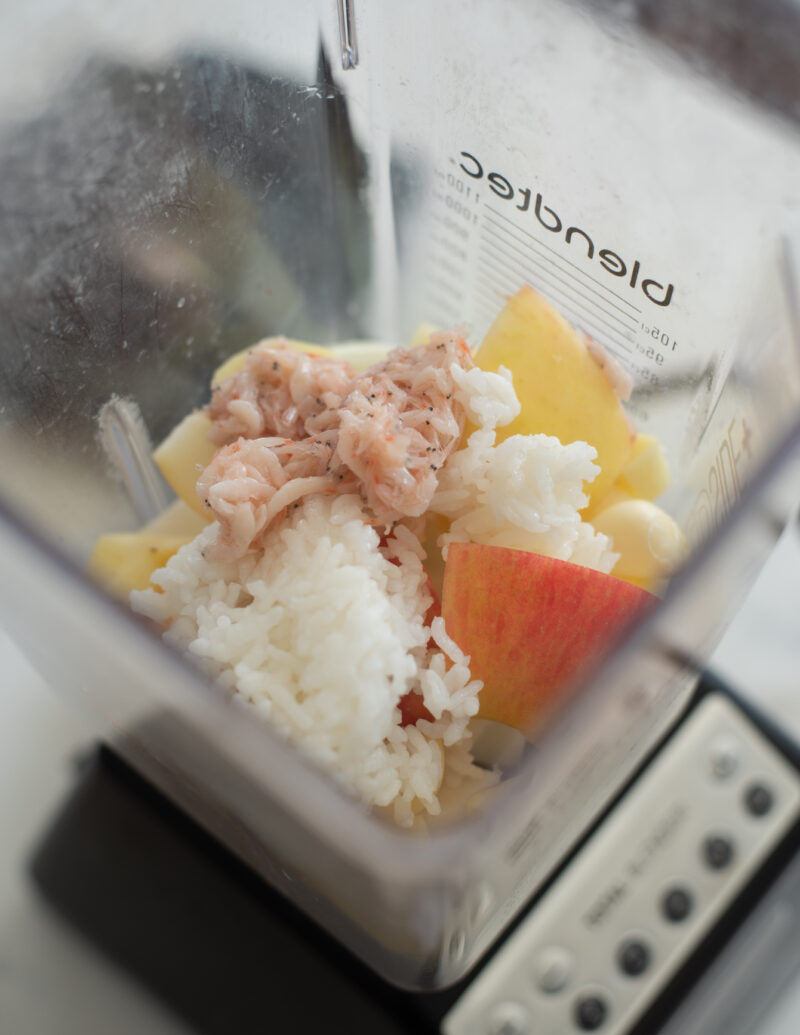
4. Blend the Base: While the cabbage rests, blend your aromatics: garlic, ginger, onion, apple (or pear), a little sugar, and your umami boosters like fish sauce and salted shrimp. I use sea kelp stock for extra depth. See note on the recipe card to learn how to make sea kep stock in 5 minutes.

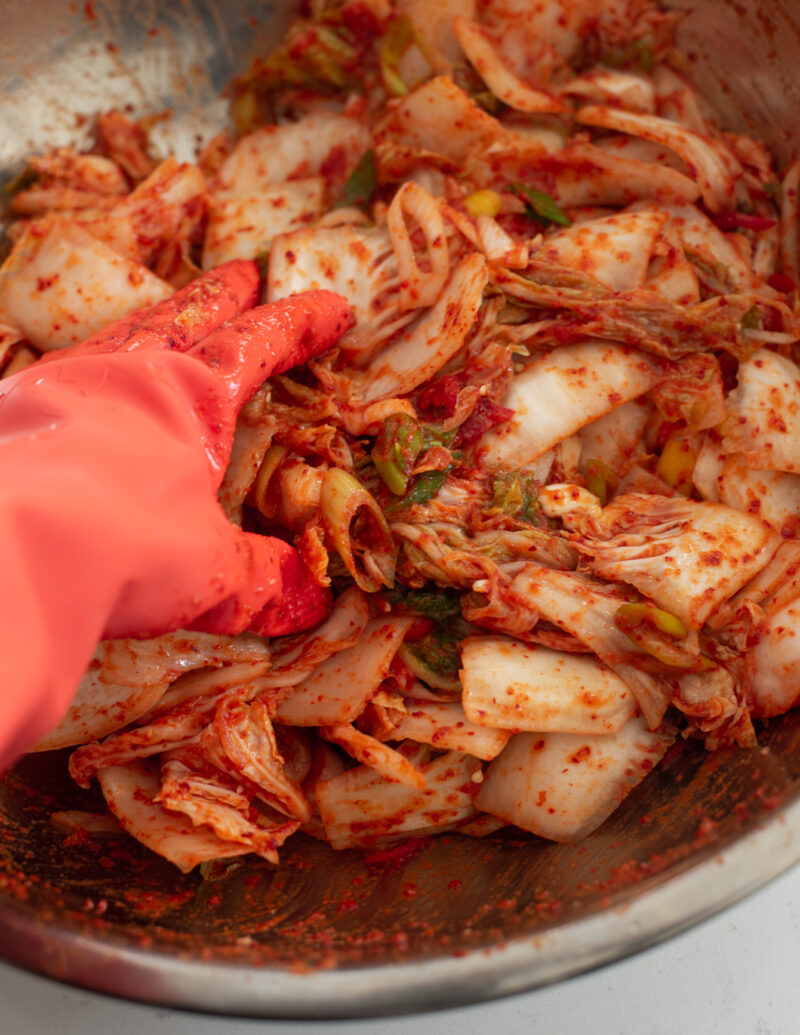
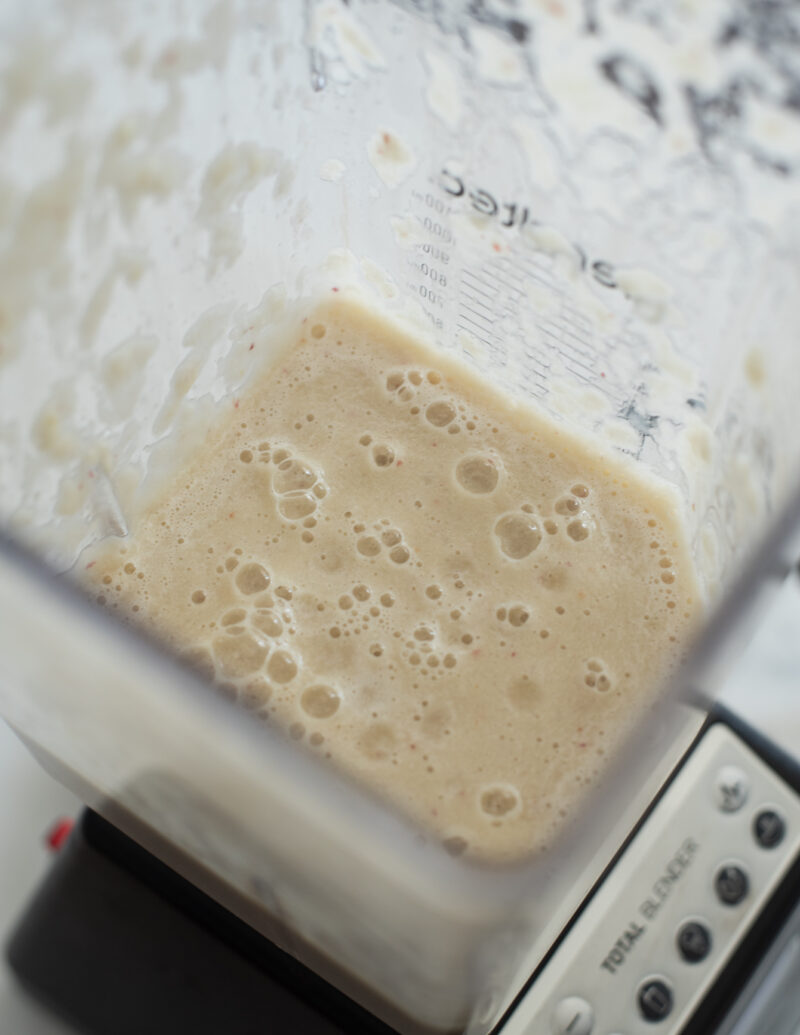
5. Mix the Paste: Once blended, stir in gochugaru and let it sit briefly so the chili flakes bloom. This step helps develop the color and flavor of your kimchi paste. Toss the drained cabbage with the seasoning paste, plus sliced leeks or green onions
Tip: I always use gloves for this part—it gets messy, and the chili can irritate your skin. Don’t worry if it tastes a little salty right now—it’ll mellow out as it ferments.
How to Ferment and Store Kimchi
Once your kimchi is packed into jars, the magic begins—fermentation is what gives kimchi its tangy, complex flavor. I usually leave mine at room temperature for a day (sometimes two if the kitchen’s cool) until I start to see light bubbling and a slight sour smell. That’s when I know it’s time to move it to the fridge.
Keep in mind, mak kimchi ferments faster than whole-leaf kimchi, so it’s best eaten within a few weeks while it’s still crisp and balanced. After about a month or two, it gets much tangier and softer—which is great for cooking, but maybe not for eating plain.
A few of my personal storage tips:
- Use airtight glass jars and leave some space at the top—kimchi expands as it ferments.
- Always press the kimchi down to submerge it in its juices. This prevents mold.
- For fridge odor control, I keep a small open box of baking soda nearby. It really helps!
And if your kimchi gets too sour? Don’t toss it—use it in kimchi jjigae or kimchi fried rice. The older, the better for those dishes.
Love this recipe? Rate it and share your experience in the comments below! On Instagram? Tag me to showcase your creation. For more delicious recipes, subscribe to our newsletter!
Easy Kimchi (Mak Kimchi with Napa Cabbage)
A quick and easy kimchi recipe made with chopped napa cabbage and spicy seasoning. This mak kimchi is crisp, tangy, and perfect for beginners.
- 3 lb (1.3 kg) napa cabbage, about 1 medium head
- 2/3 cup (200 g) Korean coarse sea salt
- 1 bunch green onion, sliced
- 2-3 fresh red chili (optional), sliced
For kimchi paste
- 1/2 large onion, diced
- 7-8 cloves garlic
- 1 inch (2.5 cm) ginger, peeled and diced
- 1/2 large sweet apple, seeded and diced
- 2/3 cup (60 g) Korean chili flakes (gochugaru)
- 1 tbsp (12 g) sugar
- 4 tbsp (60 ml) Korean anchovy sauce
- 1 tbsp (15 ml) Korean salted shrimp
- 3 tbsp (45 g) cooked white rice
- 1/2 cup (120 ml) sea kelp stock , or water (See note)
To salt brine the cabbage
-
Cut a 3-inch slit through the white stem part of cabbage. Open up the cabbage from the white stem part using your hand. It should open up easily. Cut additional slits on each cabbage half on the stem and open up again. By doing so, you are quartering the cabbage the Korean traditional way. Rinse the cabbage quarters once to wet them.
-
Dice cabbage quarters into large chunks. For the large outer leaves, slice them in half lengthwise first, then dice into chunks.
-
In a large bowl, put in a small layer of cabbage chunks and sprinkle about 2-3 tablespoons of coarse sea salt over the cabbage. Repeat the process several times, creating layers of cabbage chunks and salt.
-
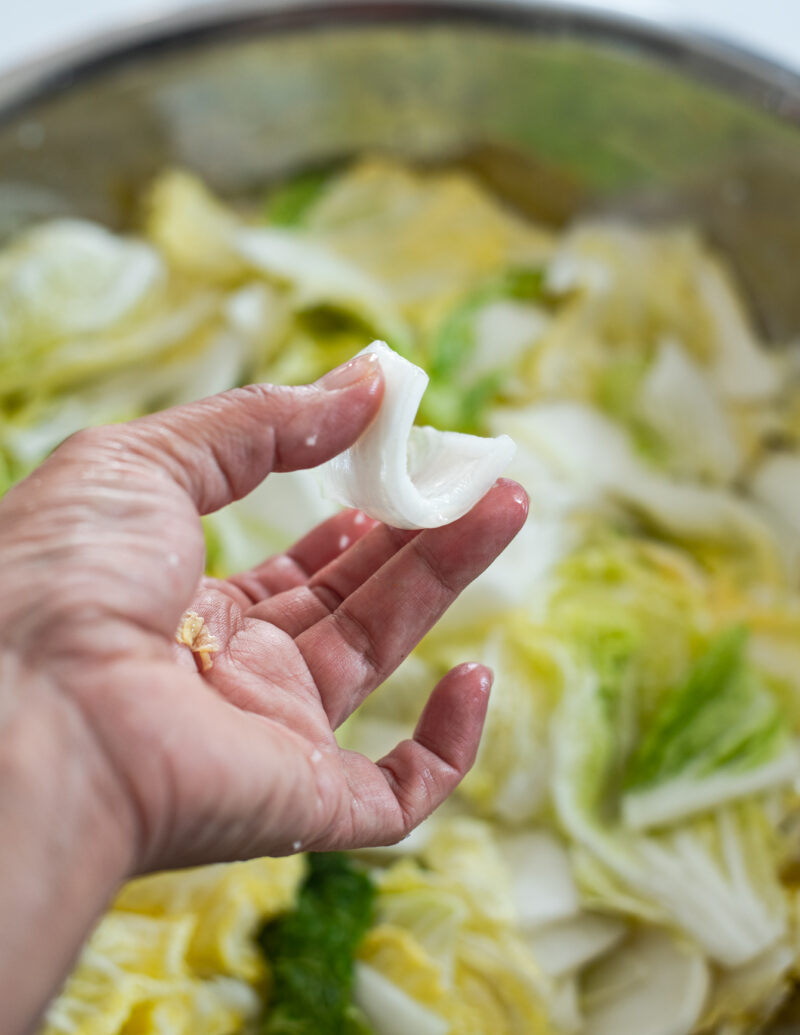
Let the cabbage soak for 1-2 hours, turning them upside down a couple of times during the soaking. When you bend the white stem part of cabbage, if it bends with a gentle pressure, the brine step is completed. Rinse the cabbage 3 times in water. Drain the cabbage in a colander, pressing down gently to remove excess water.
To make kimchi paste
-
Combine onion, garlic, ginger, salted shrimps, fish sauce, cooked rice (or other choice of starch), and fruit in a blender. Pour in sea kelp stock (or water) to allow the blade to mix the ingredients. (If using fruit nectar, you don’t need to add stock.) Process everything until smooth.
-
Pour the puree in a large mixing bowl. Add Korean chili flakes, and mix well. Taste and adjust the seasoning of paste for your liking. Let the paste rest for 5 minutes, so the chili flakes will get re-hydrated.
To assemble kimchi
-
Put the drained cabbage in a large mixing bowl. Add leek (or green onion), fresh chili (if using), and kimchi paste to the cabbage.
-
Mix well to coat the cabbage with the seasoning paste. (Wear kitchen rubber gloves to protect your hands from getting stained or smelly.) Taste your kimchi! If your kimchi tastes saltier than you would hope for, don’t worry! Freshly made kimchi usually taste much saltier, but the saltiness will subdue as it ferments.
To ferment and store kimchi
-
Pack kimchi tightly into a clean glass jar, leaving 1 inch of headspace. Seal with a lid and let sit at room temperature (60–75°F / 15–24°C) for 1–2 days until light bubbling appears. Transfer to refrigerator and let ferment 4–5 days before serving. Best within 1–2 months.
Keep the odor out: Fermented kimchi produces odor. Keep 1-2 box of odor absorbing baking soda in your fridge to keep the other food from the smell.
Calories: 15kcal, Carbohydrates: 3g, Protein: 0.8g, Fat: 0.1g, Sodium: 222mg, Fiber: 1.2g, Sugar: 1.5g, Vitamin A: 287IU, Vitamin C: 13.8mg, Calcium: 25mg, Iron: 0.4mg
[ad_2]
Source link